
How to Edit Existing Reports in IBM QRadar SIEM
QRadar comes with several hundred reports built-in by default. Many of the built-in reports will work as expected the first time they are run. Others may produce an output that needs to be adjusted slightly to filter out unnecessary data. Administrators may need to tune these reports to fit their specific environment. For example, you may run a report on user logins to a server with compliance requirements and find the report includes the valid data that is of interest as well as several service accounts that are known and should be excluded from the report output. The report will need to be adjusted to remove the service accounts so only valid data is output.
QRadar uses saved search output as the basis for creating report charts and tables. When configuring new reports the administrator will use the report configuration menu to select previously saved searches to include as a chart or graph in the report. When updating an existing report, the previously used search should be used as a template. By opening the previously created template, the update will take less time and ensure predictable results.
Assuming we are adjusting the user login report, the first step is to confirm the search that was being used. Open the report settings and navigate to the “Specify Report Contents” window. For the section that needs to be corrected click the “Define” link. Note the highlighted search name in the “Saved Searches” pane.
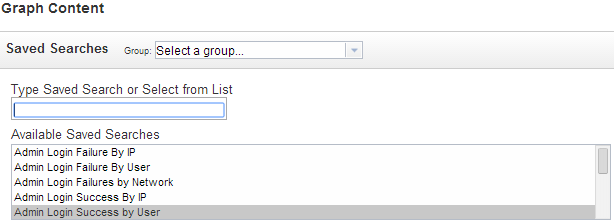
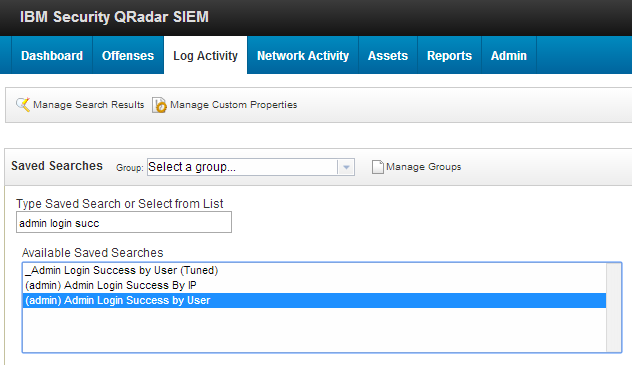
Cancel out of the report wizard. Double click the log activity tab. Choose “Search” > “Edit Search”. In the saved searches pane, enter the search name into the “Type Saved Search or Select from List” box. Double click the search to load the criteria.
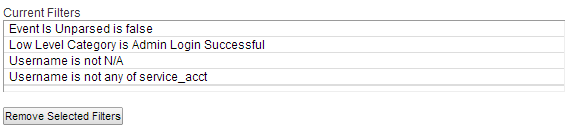
Scroll down to the search parameters pane. Let us assume there are two invalid users that need to be removed from the report. (N/A and service_acct) Click in the dropdown area where it says “Quick Filter” and begin typing in “Username”. The option “Username [Indexed]” will appear as an option. Select this option. Next from the second dropdown choose “Not equal any of” form the list. In the content box, type in the username you want to eliminate like “service_acct”. Click the [+] button to add the account to this list. Select the “Add Filter” button. Next, exclude “N/A” by choosing the second dropdown again and selecting “Not N/A”. Click “Add Filter” again. The list of current filters should look like this:
Assuming nothing else in the search needs to be changed for the report, click the “Search” button on the right to confirm the search settings are correct. This will open a log activity search matching your criteria. Review the output chart and table to confirm the accounts have been removed. If necessary, additional filters can be added at this time. If additional account names should be removed, be sure to clear the filter “Username is not any of service_acct”. When adding a filter to remove the additional account names, use the same type of filter as before and add the “service_acct” username to the new list. This will ensure only a single filter is used for both usernames.
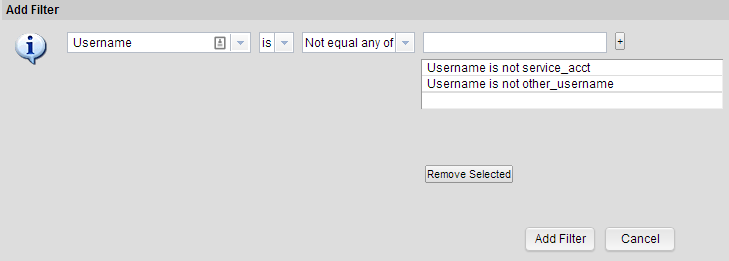
The new filter for usernames will look like this:
![]()
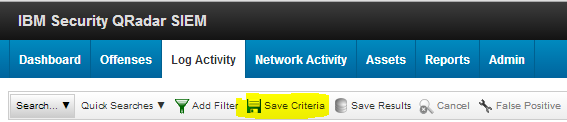
Once complete and everything looks good, select “Save Criteria” from the top menu.
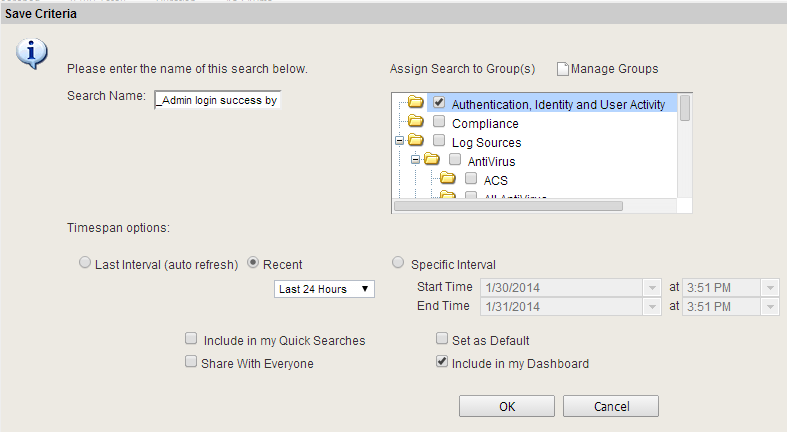
When entering in the search name to be saved. It is a good idea to note the search is a custom search that has been tuned for your needs. For example instead of “Admin login success by user” use “_Admin login success by user (Tuned)” This will put all modified searches at the top of the list, and allow for the word tuned to be searched for future use. Select any of the other settings such as “Include in my Dashboard” and the group assignment settings then click OK.
Time for fix the report. Open the report in question as before under the “Reports” tab. Open the report wizard and navigate to the “Specify Report Contents” window. For the section that needs to be corrected click the “Define” link. In the “Saved Searches” pane, locate the search you created and click to highlight it. Consider adding a “(Tuned)” to the end of the report name as well. Scroll to the bottom of the window and click “Save container details”. Complete the remainder of the report wizard and review the updated report. The report should now be adjusted and no longer include the invalid search results.
Leave a Reply
Want to join the discussion?Feel free to contribute!